After a failed experiment in upgrading the Digi Connect ME (revision A) module to the Microsoft .NET Micro Framework (.NET MF) version 2.5, I decided to peel back the sticker and see what makes this module tick. My module was completely bricked, so I wasn't losing out on anything.
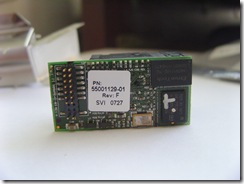
The Digi Connect ME is a 55MHz ARM 7 based .NET MF module. It has an RJ45 Ethernet port, a serial port and 5 GPIO ports. It's one of the simpler modules, and is appropriately low priced at around US $50 at the time of writing.
One of the first things I noticed when attaching a serial port to the module was this boot sequence (at 9600 baud):

Interestingly, it appears it is not the TinyCLR booting here, but another operating system 'NET+OS'. These modules are sold with two different platforms available: a NET+OS version; and a .NET MF version. One of the claims of Microsoft for the performance and efficiency of the .NET MF is that it does not actually require an underlying operating system (OS) to run - the .NET MF runs directly on the metal. It appears in this case though, that Digi has basically ported the .NET MF over the top of their existing embedded OS. What that probably means for development on the module is that any time you call a .NET MF managed method, under the hood you're just calling a wrapped NET+OS API.
If you switch the baud rate on the serial connection to 15,200, this is the boot sequence info:

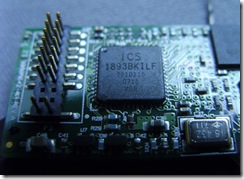
Opening up the case reveals some more interesting details...
Opening the Chassis
The case enclosing the DCME's innards is like an aluminium origami. You can easily slide your fingernail under the lip of any of the side flaps to prize them away from the main body. After a bit of unnecessary unfolding I discovered that actually all you need to do is:
- Peel away the sticker
- Open out the two aluminium tabs inside the RJ45 Ethernet port
- Unfold the under-plate's two sides
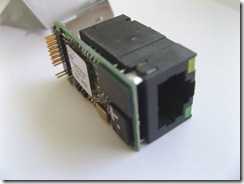
On the bottom of the DCME is an aluminium plate covering most of the module, but exposing part of the module's PCB with the 20 pin header. This aluminium plate has two flaps that fold up and around the main body. Slide a fingernail inside the lip of the two side flaps enough to unhook them from the indented clip, then the whole plate should hinge down and away from the body of the module to reveal the whole PCB underneath. On mine the plate actually came away from the chassis due to 5 or 6 bends, but if you're careful this plate should remain attached.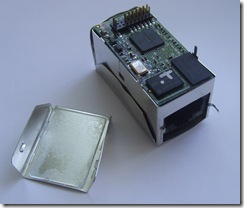
- Using a finger inside the RJ45 port, push the module out of its case altogether


   |  |    |
No comments:
Post a Comment